Category Archives: YouTube

Breaking PNG Files

New video! This one is sort of a follow-up to my last video, though this time I explore breaking PNG files.

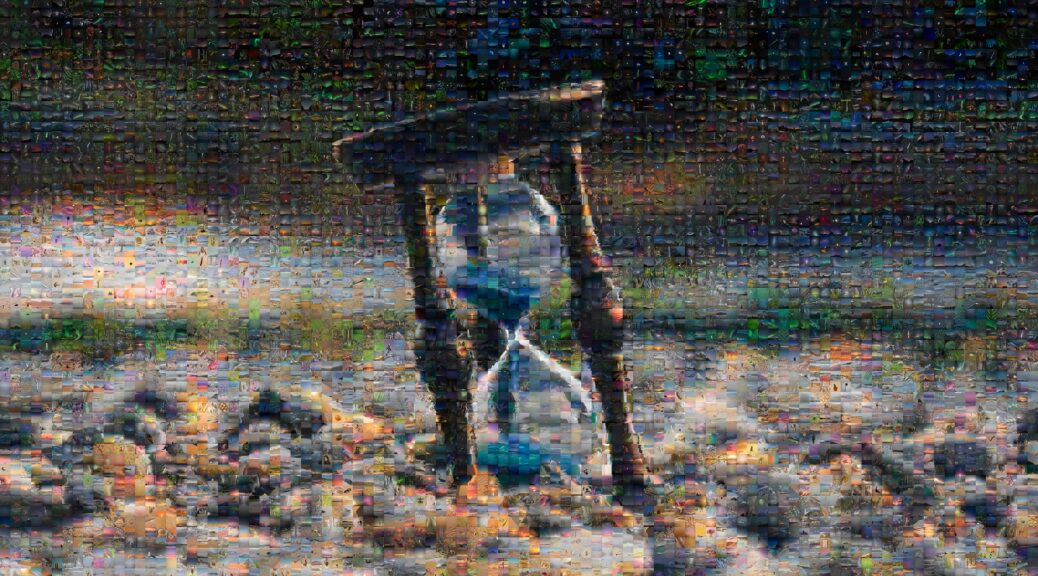
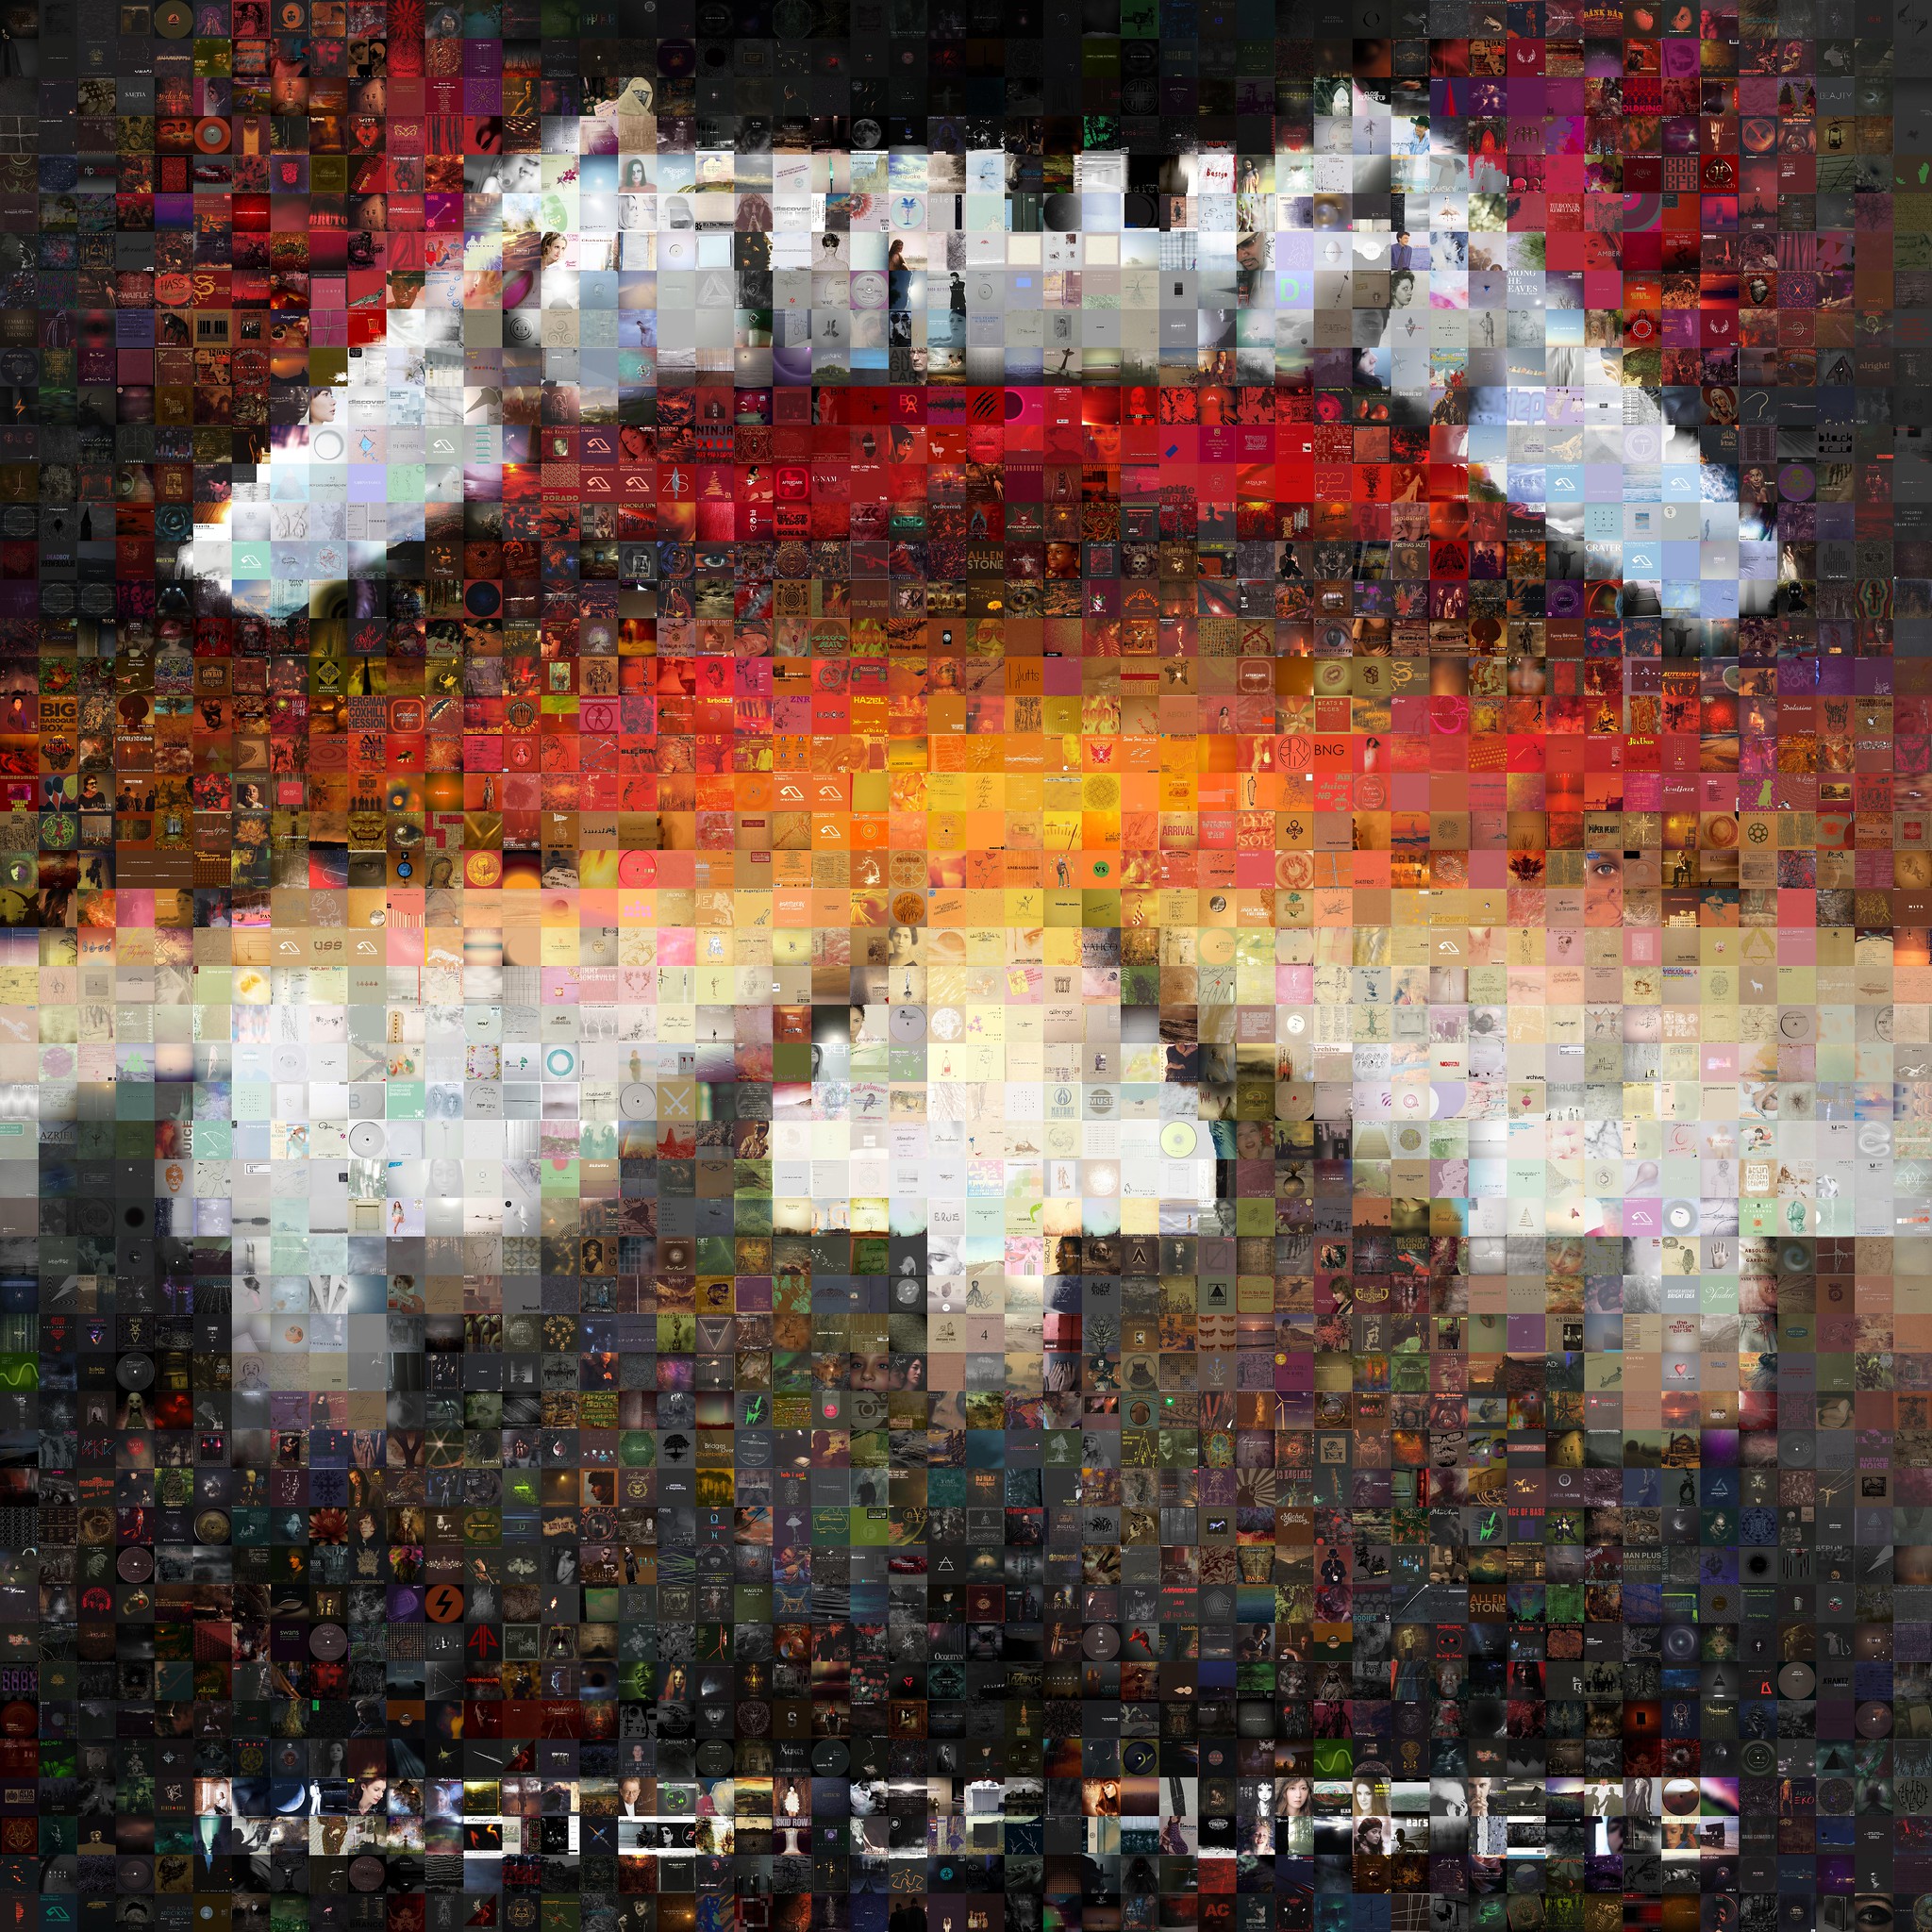
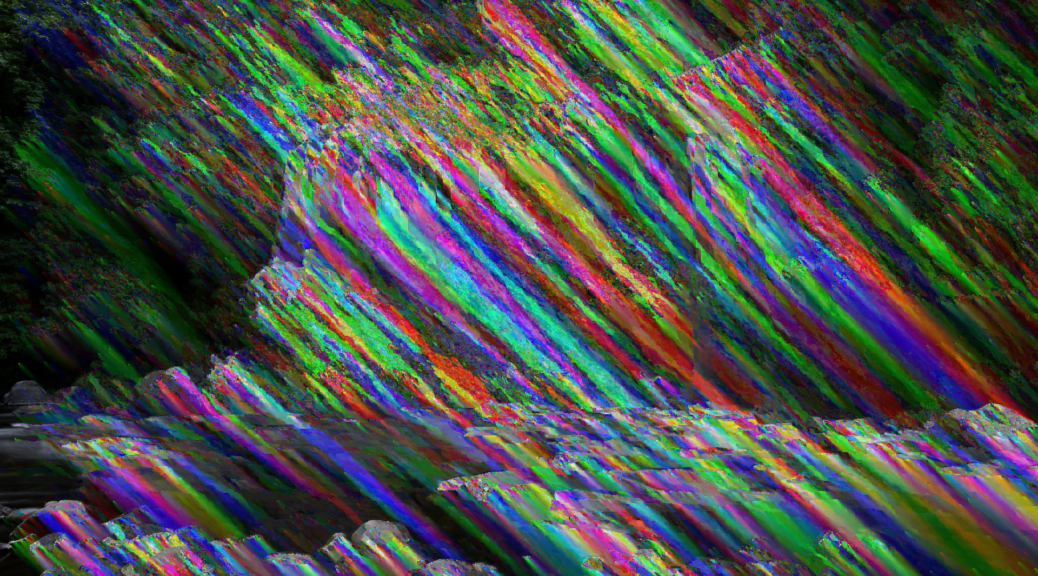
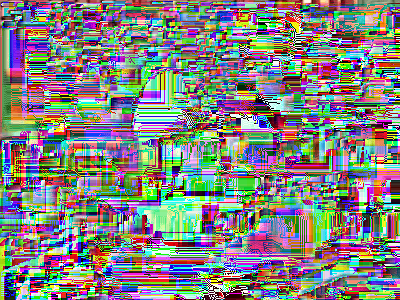
This topic proved to be a bit more complex than the last one, and one negative is that the coolest stuff is at the end of the video, which most viewers won’t see. Essentially, you can create “fake” or “custom” filters and see what errors/glitches look like by re-encoding the glitched data back into scan line space and then re-encoding it using a real PNG filter. If what I just said made no sense, well, that’s why it’s near the end of the video. But below I’ll share a few images from my favorite custom filter.

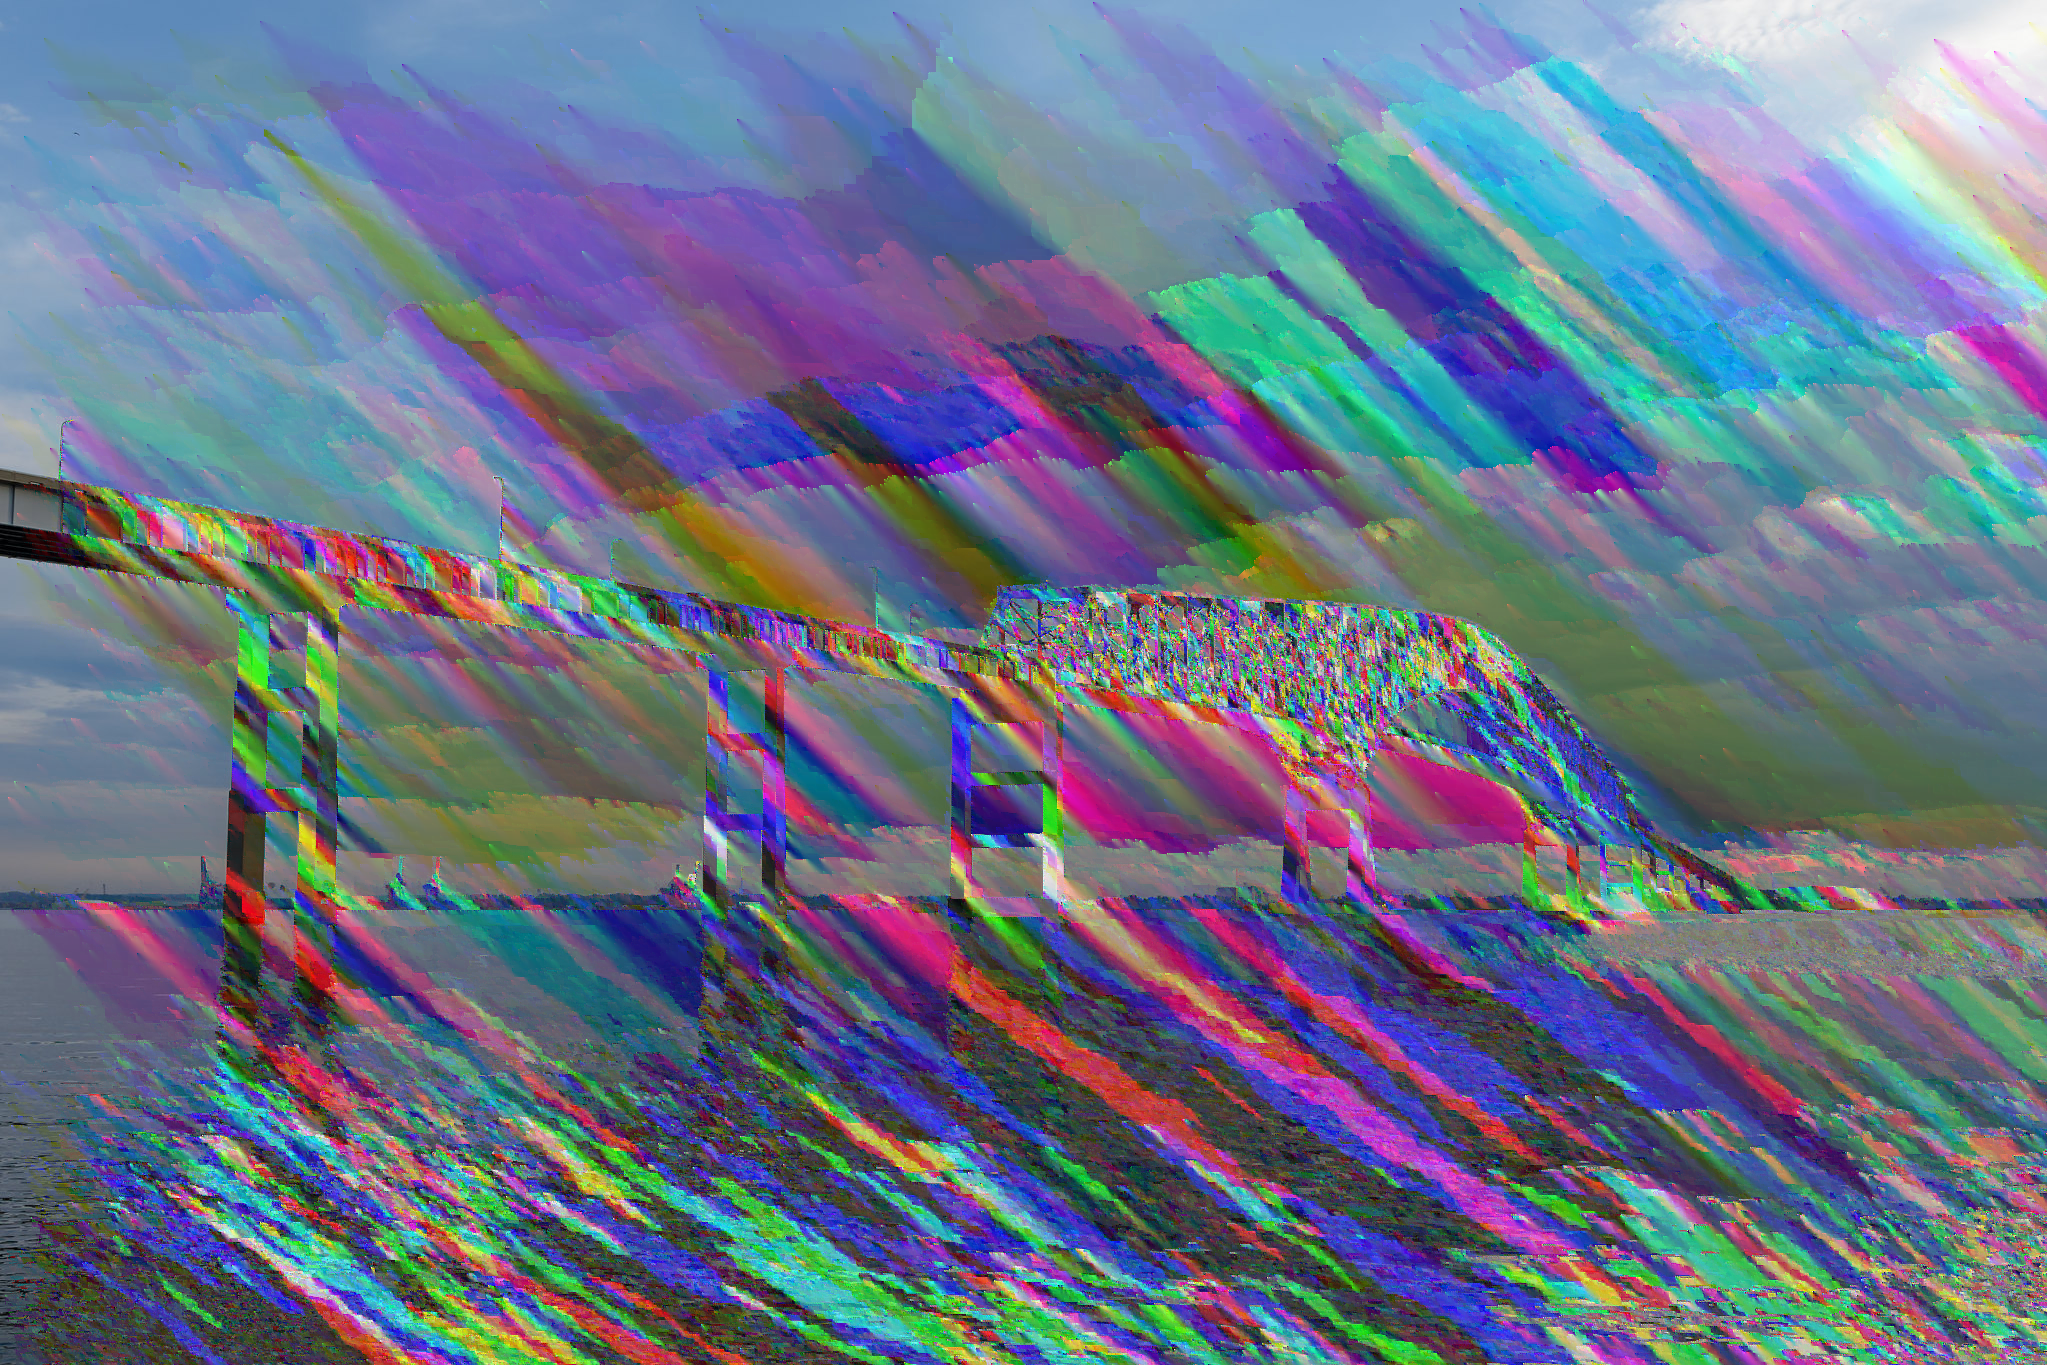
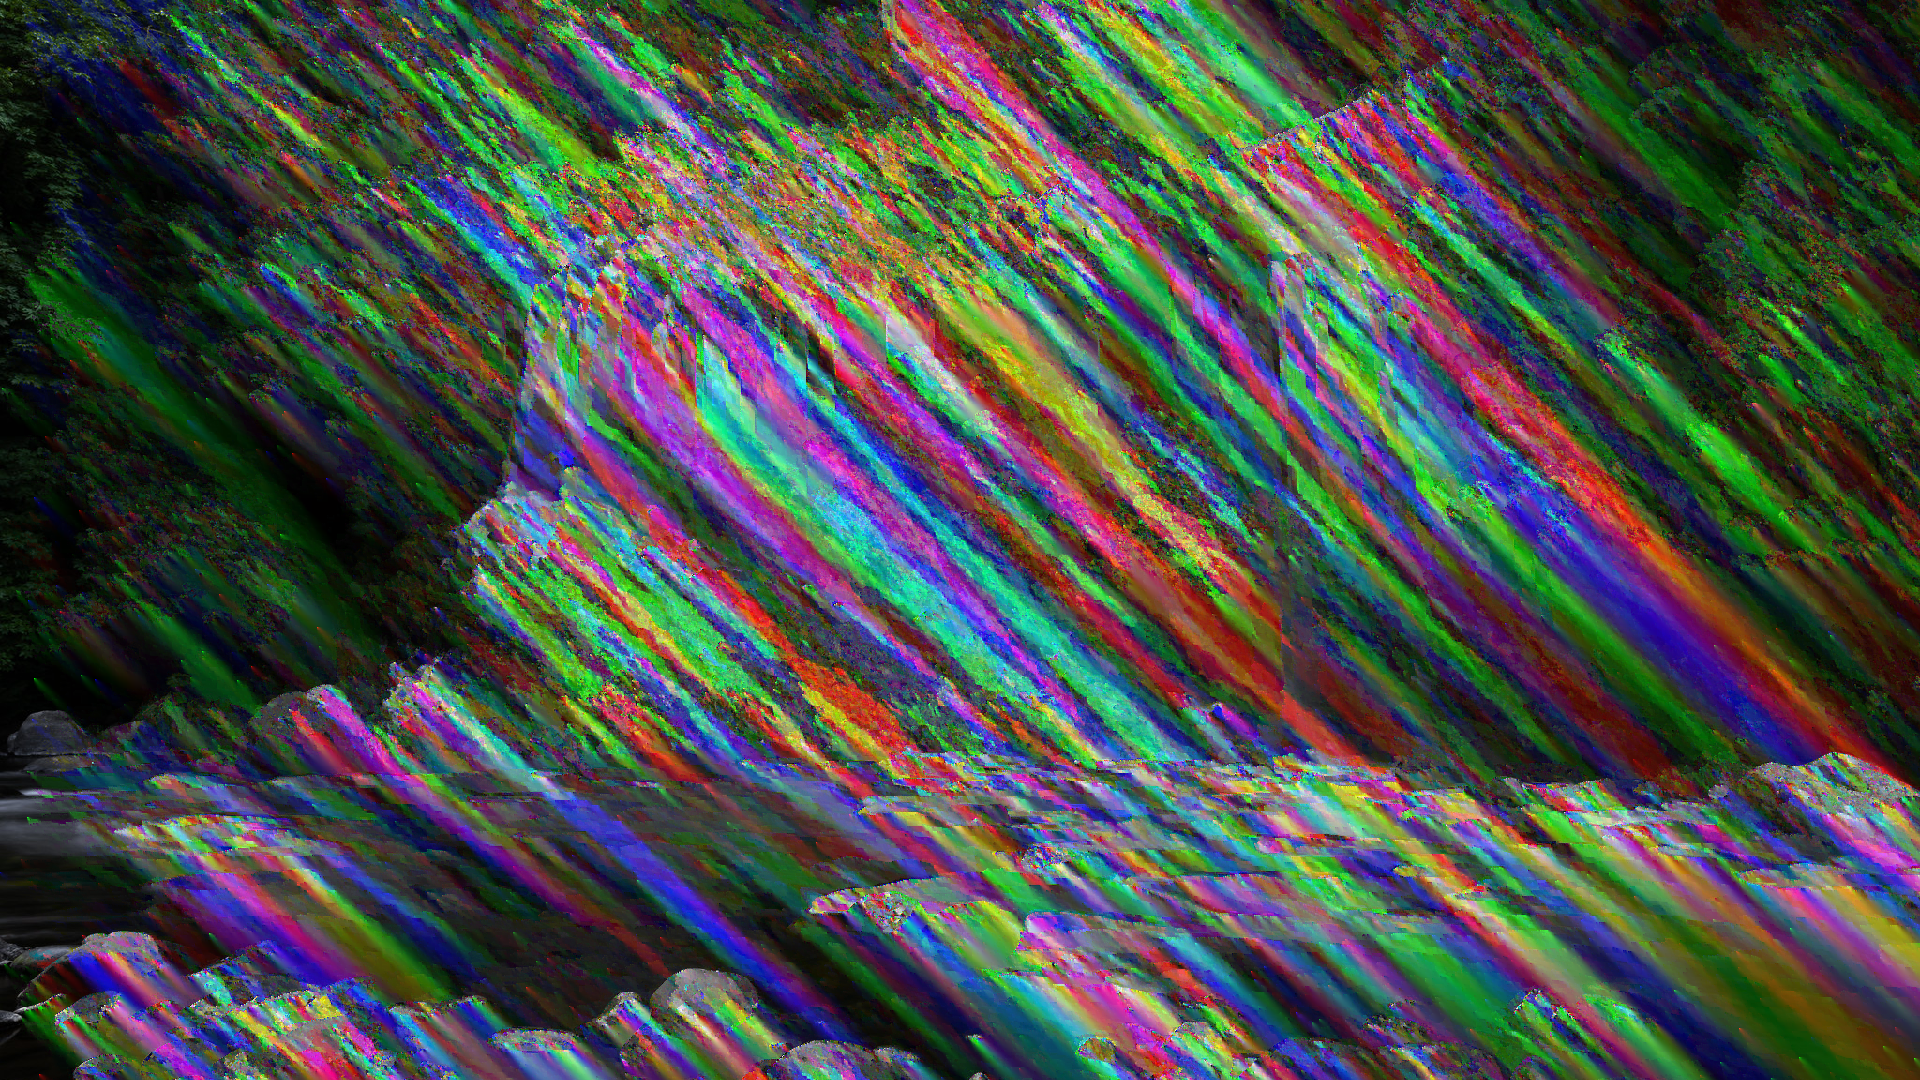
Those don’t even look like images with glitches to me. They look like images that have had paint splatted on them. And the fact that you can create any filter you want and glitch it is really fascinating. It feels like there’s so much that could be explored here.

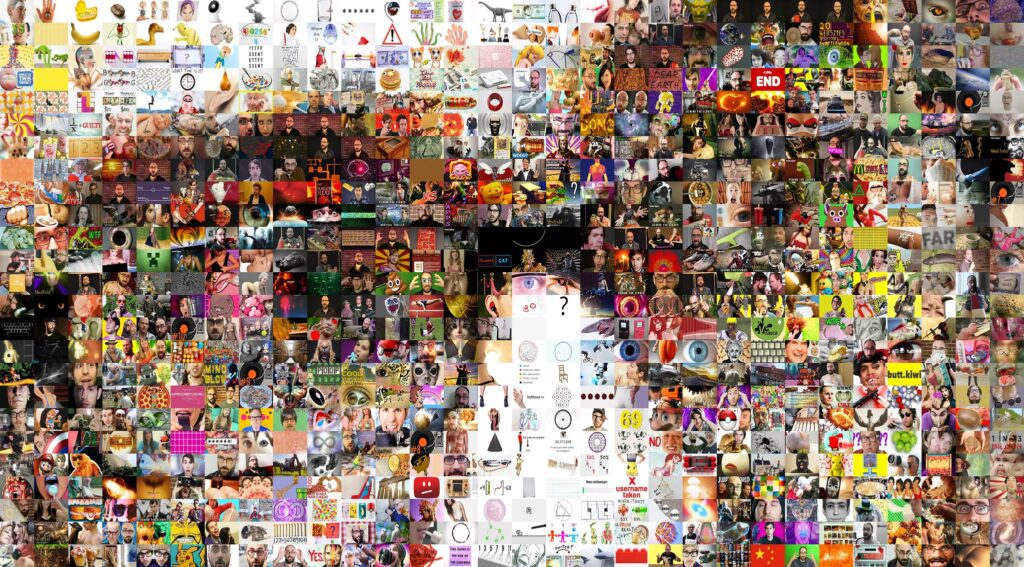
Another topic near the end of the video is glitched animated PNG files. Most people probably don’t even know that animated PNGs are a thing, but they’ve had full browser support since 2020. They weren’t officially recommended by the W3C until last year though. Apparently the PNG Development Group didn’t want animation to be part of the spec (until recently). However, I think it’s a big win for PNGs to support animation. They’re smaller, support more colors, and have better transparency support. Plus, they look cool when they’re glitched:

Anyway, check out the video if you’re curious as to how all of the works. If you’re interested in my inspiration, see The Art of the PNG Glitch, and if you want to glitch your own images check out my Image Glitcher or this script I created to glitch images (the latter allows for more fine grained control).

2026/02/13 Edit: Pressing the “Hype” button on a video really helps it. If you found this interesting and enjoyed the video, please hype it (the button only appears on mobile)!

Image Glitcher: An online glitch art editor

I’ve created a new app for this site that allows you to easily create glitch art: Image Glitcher

It’s a simple tool that combines an image preview with a hex editor that has segment highlighting for jpeg images. In the future I hope to support highlighting for other formats too. The idea is that you can more intelligently make glitches in an image file when you know what you’re editing.

I created a short video about the tool framed around the idea of what happens when you edit a jpeg in a text editor. You can watch the video below.

This video was a lot of fun to research. Weirdly the research phase has consistently been the most fun part of the video making process. Originally I was going to cover all of the main image formats in this video (jpeg, png, bmp, gif), but jpegs wound up being much more complex than I anticipated.

There’s also a lot of weirdness with the file type that I opted not to cover in the video (I wanted to keep things focused). For example, you’ll often hear that jpeg’s use the YCbCr color model (basically luminance + color), but that’s not mandated by the spec. It’s actually color space agnostic. You can actually create a jpeg where it internally stores the data as RGB values (though jpegs usually store the data in YCbCr).

You’ll also often read that the two most popular formats of jpeg – JFIF and EXIF – are incompatible with each other. This seemed really confusing to me until I saw the color coded segments in the editor. JFIF is determined by a JFIF APP segment following the SOI marker, and EXIF is determined by an EXIF APP segment following the SOI marker. Jpeg parsers should have little issue differentiating them. Though possibly even stranger, you don’t even need this segment in a jpeg. Wikipedia often strips it out.

Anyway, there’s a lot of random info I left on the cutting room floor. Maybe one day I’ll work it into something else.

What happens if you blur and sharpen and image 1000 times?

I made a new YouTube video! This one is doing better than usual. I think I may have finally found my groove, though I have no idea what I’ll do for my next video. Amusingly this came about kind of quickly and kind of randomly. I wasn’t planning on making a video, I just went down this weird rabbit hole when I noticed this effect, and wound up learning about (spoiler alert) Turing Patterns. There’s a lot more that can be said about reaction-diffusion but I wanted to keep the video high level and light. It’s just a cool effect that has a neat underlying mechanism.

I’ve made available the accompanying web app and video generator I created to make the effects in the video. Had I known people would ask for them I probably would have done them in a different language, as JavaScript is really, really slow for this kind of stuff. However, it’s the language I’m most comfortable in and I was able to bang it out really quickly (you may notice that web app is just a hollowed out version of the Color Palette Generator I showed off a few weeks ago).

My new 404 page lets you set it on fire

The video does a pretty good job going over the new 404 page. I actually wasn’t planning on updating the 404 page. What happened is I wanted to create a “Fire” filter for the TAAG app, and while looking into how to create a pixelated fire texture I stumbled upon the Doom Fire algorithm. It was simple yet produced such a cool result – I felt I had to do something with it, and that’s when the idea of re-doing the 404 page came to mind. I’m now kind of debating even making a separate app just for burning text or other things, as it’s weirdly kind of fun.

Anyway, if you like the video please leave it a like / comment / etc!

New Arial ASCII Art Gallery

Years ago I setup an Arial ASCII Art Gallery based on the art I decrypted from Fate Zero, which was a popular prog from the late 90’s. The ASCII art from that time period is pretty cool and I felt like it deserved a spot on the net to be preserved. However, a lot of time has passed since then, and that gallery hasn’t aged well.

For one, all the files were encoded in Windows-1251, which is what Windows used prior to moving to unicode. This encoding used a single byte for each character and had a different character mapping. Additionally, sometime between Windows XP and now, Windows changed how it rendered the Arial font, so now many of the pieces looked a little messed up (I think this change was to make it more in-line with how other OSes render Arial).

Rather than let the gallery stay by the wayside, I decided to give it a major face-lift. I wrote a script to convert the Windows-1251 encoding to UTF-8, and then spent a minute or two on each piece, fixing any obvious errors. The old gallery still rendered properly on Windows 98, so I used a VM of the site there as a reference to any edits I made.

I also decided to over haul the UX. The old gallery required over 500 clicks to see everything, so for the new gallery I decided to put everything on one page. And to ensure good performance, I used virtualization. However, virtualization kind of messes up the browser’s Ctrl+F find feature, so I decided to write a custom search feature to allow users to search through the art.

This is where things got a little hairy though. I thought maybe I could use AI to generate tags for all of the art (my plan was to use IntelliJ’s AI assistant to comb through the files), but it turns out ASCII art is the kryptonite of LLMs. They have no idea what they’re looking at and will just hallucinate a response that makes no sense. So I had to settle for a feature that looks at the filename and file contents. However, I thought the hallucinations were kind of interesting and decided to make a short video on the topic:

Anyway, if you’re interested in checking it out you can find a link to the new gallery here:
Arial ASCII Art Gallery

And now, 25 years later, version 3.0

25 years ago this month I released version 2.0 of my Mosaicer program. Today I release version 3.0. I hadn’t anticipated waiting 25 years, and I was originally going to do a follow-up much sooner, but when I was originally thinking about a version 3.0 the holder of a patent on photo mosaics was issuing cease and desist requests to developers working in the space.

I never got a cease and desist for Mosaicer 2.0, but I didn’t want to bring any extra attention to myself in the off chance I would come onto the patent holder’s radar. At the time I remember reading through the patent and finding it overly broad, and looking at it again today, I feel the same way. I don’t see any way to create photo mosaic software without violating Claim 1 in this patent. And the guy who filed the patent wasn’t even the first person to make a photo mosaic. The whole thing just seems absurd.

But the past is the past. The patent expired in 2017. I could have released a version 3.0 then, but I had moved on by that time and was busy doing other things.

I had always wanted to revisit the app though, and a few weeks ago I remembered an idea I had for a photo mosaic app that used an FFT block matching algorithm. I had read about it in grad school and always thought it would be a good fit for a photo mosaic program. So I got to work and wrote a new photo mosaic app in Java – Mosaicer 3.0.

However, when I got to the part on writing a tile matcher that used the FFT algorithm I came to the sad realization that it was a poor fit. It did way more calculations than necessary and was more expensive than the standard sum-of-squared-differences calculation. Coming to this realization was a huge bummer, though since I was 90% done at this point, I decided to carry on and just finish up the app.

Mosaicer 3.0 isn’t really anything special – with the patent having been expired for 8 years now there are a lot of free and commercial options out there. However, one more free photo mosaic app can’t hurt, and one thing I thought I could provide that seemed to be missing was some good info on how to get images. That’s actually the hardest part about making a photo mosaic. So I put together a short list of resources and datasets that one can use when creating mosaics.

The albums dataset is especially cool. You can make album covers out of album covers. I made a Flickr Gallery of some of my favorites. Below you can see one of Metallica’s Master of Puppets.

Another idea I had was making YouTube thumbnails out of YouTube thumbnails. The yt-dlp app allows one to easily get thumbnails, and I was able to make some VSauce thumbnails entirely out of other VSauce thumbnails (example below). The only problem with this idea is that photo mosaics require a lot of images, and most channels don’t have enough videos.

Photo Mosaic of VSauce’s “Mistakes” thumbnail, made up of other VSauce thumbnails

I’m not sure if I’ll continue development on this app, but it’s been kind of fun to play around with.

Lastly, I made a short video on photo mosaics. If you’re interested you can watch it below.

Making a follow-up to Subpixel Snake

I thought it might be fun to make a follow-up to the Subpixel Snake video I did a few weeks ago. One regret I had after I posted my original video was that I didn’t show more of the game itself, and I only showed it on my iMac screen. So for this video I decided to show what it looks like on a variety of devices.

This was a ton of work, and I actually recorded more screens than what I showed in the video. However, most devices seem to use either an RGB stripe or BGR stripe subpixel geometry, and I was a little worried it could get boring if I showed a 20 screens and most of them were those 2, so I whittled things down to what I thought were the most interesting.

I really wanted something cool to end with (even though most people don’t make it to the end of a video), and I wound up hearing about this computer called the OLPC XO that had a unique subpixel layout. It’s screen had 2 modes: a monochrome mode for use in sunlight (similar to the Game Boy), and a backlit/color mode for use in darkness. When in color mode, each pixel would become either a red, green or blue subpixel along a diagonal line.

The thing even had a really cool story. It was supposed to be this $100 laptop that was going to change the world – children in developing countries would get access to a computer and the internet with one of these devices. They’d be able to learn about open source and linux and have access to the same information as we do in the developed world. There were even plans to add a hand crank as a way to give the machine power. Sadly though, the initiative failed, though they gave it a good shot and made a few hundred thousand of these devices.

Anyway, it just sounded really cool device and the perfect way to end the video, so I picked one up on eBay for $125. Initially was going to sell it afterwards, but it’s actually a lot of fun. The only downside is that it looks like you can only enter your name in once when setting up the computer, and because of the wonky keyboard I typed “Pzt” instead of “Pat” ????.

Anyway, if you have some time check out the video, and if you enjoy it please like / comment / share it!

Going back to AOL 4.0…

I recently came across a project called NINA which has setup servers that the original AOL 4.0 software can talk to. After setting up a Windows 98 VM, installing AOL 4.0, and then configuring it to talk to NINA’s servers, I was able to log into AOL 4.0 for the first time in a very long time. It was pretty wild to hear the iconic “Welcome… You’ve Got Mail!” intro that I so often used to be greeted with. 

Since I was back in AOL, I was able to try out Mark Zuckerberg’s old fader apps, which I’d written about a few times previously. It was also cool to play around with some of the progs from the past. It was like a weird time machine.

Anyway, if you enjoy the video please like/comment/share, it seems to really help it in giving it a boost.

New Video: Subpixel Snake

The YouTube video I made 2 weeks ago actually performed reasonably well so I decided to follow it up with another idea I had. This one is on a subpixel version of the Snake game on this website. I have been messing around with a macro lens recently and thought it would make for a fun video concept. You can watch it below.

Even if it doesn’t look it, this video was waaaay more work than the other video. I could have probably done a whole video on just trying to capture the snake gameplay footage – I wound up having to lay my computer on my lap, tape the microscope in place, and then gently hold it so it would stay still.

I’m pretty sure most of the subs I’ve acquired over the past 9 years are inactive. Not counting these past 2 videos, the last time I posted a video was 7 years ago. No one viewed the previous video during the first 3 hours it was up. I had to ask my son to go watch it so it would have at least 1 view. After a day and a half it only had 23 views. Then, for some unknown reason, the YouTube algorithm kicked in and (as I’m writing this) it now has 25k views. Thank you to anyone who watched and/or liked the previous video! Also, on that note, liking and commenting on a video really helps it. On my previous video I noticed it seemed to get boosted after comments or likes were added, so if you have a moment doing either of those would be greatly appreciated!

If you pause, it will disappear…

So I randomly came across a video on youtube where a person made an image inside of static by having some static stay the same from frame-to-frame. It was really trippy and I suddenly got an idea – I could do the same thing, but with a real image. It’s hard to describe, but if you watch the above video (done by me), you’ll see what I’m talking about.

I coded the whole thing up this past weekend (available on github here: Image Quilter). The code is really rough, but I knew if I didn’t finish it fast, it would be something that just fell to the wayside. In fact, sitting here now the whole thing seems a little silly, but it’s kind of a neat illusion. In place of static, I used texture generated from a texture synthesis algorithm. It’s from a paper I read 20 years ago. I came across it in one of my college classes.

Amusingly I wound up having to implement Dijstra’s algorithm to get it working. I remember learning about that in school – and in the past 20 years I’ve never had to use it. But it was cool to finally break it out for something.

Also, I don’t think I’ve ever recorded a voice over before, so sorry if I sound wooden. I think everyone thinks their voice sounds weird and I wasn’t totally happy with it, but it was either my real voice or text on the screen, and I’m not a fan of the latter type of video.

Approved comments

In other news, I hadn’t checked the spam filter for this blog in a long time and there were a lot of real comments caught in it for some reason. I went in and approved all of the non-spam ones that I saw. Sorry if you had a comment that didn’t displayed until now. If you still don’t see your comment just shoot me an email (see the contact page).